9/11/2015

Tutorials tone vintage photography for beginner

Tutorials tone vintage photography for beginner


Hello guys, vintage is a tone that is widely used by photographers, especially those who love the photo processing. a photographer edits are characteristic, usually when we see the image without seeing people uploading, we know that the results of photographer A, when we look at the other photos we immediately know that the photo had the B. nah it's called a characteristic, typical tone corresponding to our own creations, but can replicate and change them a bit.
at this time I will make one vintage tone with vintage themed fantasy.

The first step first:
photoshop open directly input the photo you wish to edit.


Step Second :
we create the frame by using a black brush, first create a new layer and then we created a frame with a brush as below, then subtract its opacitiy.

third step :
after the manufacture of the frame is completed, we provide highlights strong, if the photo is too over, we just remove it, in the most important part of the object.


The fourth step
so that a sharper tone we get into the panel black and white, then change its BW tone panel like this, if you are finished press OK, and reduce its opacity.


The fifth step
manufacture of light, as is usually the manufacture of light using a white brush with outer glow effects that are blending option.
tutorial manufacture of light here.


The sixth step
provide selective color touch - neural like this

finish 


Strictly forbidden to copy-paste this content, Copyright tutorialtonephotography.blogspot.com
Related Post : 

9/10/2015

Photoshop tutorial how to create a retro effect easily.

Photoshop tutorial how to create a retro effect easily.

hello this time I will make tutorials effect again, this recommendation of friends who send messages via email (galihphotography12@gmail.com) wanted in Make tutorials retro effect.
for the maker of this effect is actually easy, just play panels located on the adjustment only, but there are also some people who want instant mebuat retro effect using the instant application, such as the B612, the features of the instagram, photoshop mobile applications, and others.
I think if we got used to process images using the instant application as it is, there is no satisfaction art itself. and no pride. hehe
direct yes.

The first step
open the photo you wish to edit, file- open your photo - ok
not to forget the duplicate layer was yes. (my advice)


The second step
layer already in duplicate, give highlight effect by pressing CTRL + M, set so similar to the letter S.


Third step
create a new layer and fill it with white, then click gradian existing folder in the left pane you, then cross horizontally and vertically, and select custom colors that you want, and then lower the opacity as needed, and the layers panel made linear dogde.


The fourth step.
give effect beams, or the sun, by creating a new layer again, and 2 click brush size to 300 with white color in the upper left corner of your photo (adjust the sunlight is there) after that, go to blending options - outer glow and set customize to your taste.


The last step
give a little touch of levels, RGB + blue as below.


Finish !


Strictly forbidden to copy-paste this content, Copyright tutorialtonephotography.blogspot.com


9/09/2015

How to make a digital manipulation


How to make a digital manipulation

by tutorialtonephotography.blogspot.com

by tutorialtonephotography.blogspot.com

by tutorialtonephotography.blogspot.com

by tutorialtonephotography.blogspot.com

by tutorialtonephotography.blogspot.com

by tutorialtonephotography.blogspot.com

by tutorialtonephotography.blogspot.com


Time and again I see the banner of great products that broadcast a digital work with a unique theme, to the layman perhaps it is indeed true, but only the manipulation of photograph alone, for example, no photograph of a baby that is embraced by two hands, there is also a form such as a horse-headed man, apples have mouths etc.

actually it's just concocted, typically using Adobe Photoshop software to manipulate pictures like that. Now what if you want to learn to make a photograph like that, the most important thing to make a picture like that is a strong idea and imagination.

we can imagine in advance will be made of what this photo, for what this picture, and the theme of what this photo? do not create a work of art without the manipulation of the elements of meaning at all, it will make the value of a picture down, then how want to stir the imagination and creative ideas like this photo?

The key is often a fantasy movie. Try to imagine the film harry potter, spiderman, hulk, avenger, etc. It's a film full of high imagination. Before you create a photo manipulation to consider this:

1. Themes
The theme plays an important role for the final result of a work, the theme can also be made from the beginning before making the manipulation of photographic works, a theme that is often made in a work of art of manipulation, which is the theme of life, or daily activities.

2. The creative idea and Imagination
It's very important, from the whole. Perhaps the theme is not very prominent, but the uniqueness of a photograph itself would be of high value. How can creative imagination, often you watch a movie fantasy, it is the key.

3. Supporting equipment
It is also very important, we will not be able to create a work of art without ancillary equipment, such as cameras, laptops, software abe photoshop and others.

4. The ability to capture the imagination applied into the picture.
imagine you when the imagination, the imagination suddenly faded and instantly forgotten? so every imagination in my opinion in the compulsory carrying one sheet of paper and a pencil, when we imagine, we pour it directly into an image, though look abstract.

So the core of a specified expensive works of imagination, ideas and the ability to process images themselves.
Hope it is useful.

Strictly forbidden to copy-paste this content, Copyright tutorialtonephotography.blogspot.com

Photoshop Tutorial How to Make Dreams Fantastic Effects

Photoshop Tutorial How to Make Dreams Fantastic Effects
hallo lovers of photography, this time I'll make a tutorial effect dream to photograph my friend, for a tutorial now and so I will go straight to the point, so do not discuss where the tools were located and there in the feature panel box which, as previously about basic photoshop I have published in the previous tutorial so check it out ya, click here
we immediately began !!


The first step
Open your photos and input to adobe photoshop, I remind every editing do not forget duplicate layer first. because I think it's very important.


 the second step

Once the process is complete duplicate entry into curves and set like this, adjust the blue panel as needed


Third step
we give a shadow effect frame, by making empty layer and click the add layer mask, black foreground position so that later on when we click the brush turns white.

The fourth step
we give effect highlights its way into the panel and create curves like the letter S.


The fifth step
then we will make a roll of light by using a brush white color and dimensions of the brush size to 300, then we make slashes, adjusted to the needs photograph (the location of the light, or the position of the sun at that time to make it look like real) because this effect dream so I fit the tastes I.

The sixth step
after making a transverse brush as above, we go to the menu we set the blending option glownya outlet.

The final step
after completion of the above process, we go to the selective color, and change into neutral set as below, is completed.


Done .


Hope it is useful.
Disclaimer This copyrighted article http://tutorialtonephotography.blogspot.com/


Photoshop Tutorial 3 steps to create a blur effect to photos is easy

Photoshop Tutorial 3 steps to create a blur effect to photos is easy

Hallo Guys !! Watch and Learn how make effect blur for beginer
Tutorial blur effect using Adobe Photoshop CS3
 immediately wrote open adobe photoshop you


The first step
 Click File - Open the folder of photos you - ok
 I was a little wear good quality photograph in order to facilitate the selection process, but do not worry if you have a photograph that have the smaller resolution can use the polygon lasso tool, the tutorial is here


The second step

Press CTRL + J to duplicate the layer, then click the filter blur, gaussian blur, and set up to suit the needs of blur photos.


Third step
Then go to the background layer selection as below, do not forget to remove the first eye in the second layer, after the completion of the selection process is moved to the second layer do not forget to check the back of his eyes layer directly press delete. as follows.


DONE !


may be useful.
disclaimer This article is protected by copyright tutorialtonephotography.blogspot.com


9/08/2015

Comparison of Nikon and Canon


Comparison of Nikon and Canon


At today's DSLR cameras have a very trend and looks slang, DSLR cameras often makes a person self-confidence not to make money: D that's what I see in the field. the fact that 80% of women over men approached someone who has a camera? if true, yes, of course, women prefer to take pictures selfie published to social media, especially in a photo by using a very good camera.
 DSLR camera is now very easy to be found, many people who pick and would like to have. Actually, there are many brands to choose from a DSLR camera but many people prefer to choose a DSLR camera brand Canon or Nikon, both have brand big enough for the world pioneer photographers often use the second brand.

In this review will discuss the difference between Nikon and Canon DSLR cameras. Starting from Canon, Canon camera in the world in particular is very well known and widely produce DSLR cameras that have a good quality. Canon provides several collections of complete and high quality lenses. All types of lenses in the Canon, you can get different types of lenses that fit your needs. In addition, the quality of the resulting picture is better. For beginners is available a wide choice of shapes and models. The price is affordable ranging from 100 USD to 5000 USD or more. Wow fantastic, therefore adjust as needed if you want to start living in the world of photography.

Canon cameras have different shapes that vary according to the model, the beginner can select them according to individual taste. Canon's in-camera image quality is also tiered according to the series. Canon 50D, the picture quality is 10 Mp or 10 megapixels to 15 megapixels 60D image quality, and for the 70D is 18 megapixels. Thus, each level of the camera provides picture quality is different. Of course the price also varies according to the series and also the features that will be obtained. If the observed overall, Canon DSLR cameras have faster image processing so facilitate you learn photography. Canon camera also has 3 categories, namely cameras for the amateur with a series of four or three numbers eg Canon 1100 D, Canon 550 D, for a series of semi-professionals that Canon 60 D, 50 D, 40 D has a series of two numbers, and professionals have one digit Canon 5 D Mark I, II, II Canon 1 Dx etc.

Canon cameras are often recommended for beginners, due to lens upgrade price is quite affordable.
After identifying a Canon DSLR camera, you should be familiar with Nikon digital SLR cameras. Nikon DSLR cameras are not less good with Canon DSLR. In this review will compare to see the difference Canon and Nikon DSLR cameras. Judging from the shape, Nikon DSL camera was lost by Canon. Nikon has the form interface is arguably simpler not easily grasped as the Canon, but the Nikon DSLR cameras have many advantages compared with Canon DSLR cameras.

Nikon DSLR cameras have many features that are not owned by Canon, one of which is a feature that can photograph objects in the dark. In Nikon lot of additional features that can satisfy the lovers of photography. Comparison of Nikon and Canon DSLR cameras not only in its course, but the model. To issue a Nikon camera models clearly far less than the Canon. I think the canon: D, unless I am definitely more favor Nikon users Nikon, Sorry kidding: D! Canon has a form that is easy to use while the Nikon camera is rather difficult to operate, even when viewed from its Nikon far superior than Canon. Judging from the quality of the picture, Nikon also lost because Canon can shoot up to 18 mega pixels while Nikon can still only 12 megapixels. But back to the philosophy of a photographer, not all the images of high value by using an expensive camera, a camera phone can make the value of a photograph is very expensive, for example, photo moment is rare, and the moment the personal that can not be paid with money and very valuable for personal itself.

Then, how is it better than the Canon or Nikon Nikon better than Canon? To take the decision we have to go back kekebutuhan our initial intention, do not get confused because all the cameras CANON and NIKON very cool and extraordinary. !

Other Article Price Camera Nikon and Canon Click here

How to create photo blur on DSLR cameras

How to create photo blur on DSLR cameras
Hello, all .
this time I will make an article about how to create a blur effect in photographs using a digital SLR camera. The following questions are often catapult by some people who are new to the world of photography.
1. how the camera settings to create a blur?
2. Composition Exif camera should be how to make photos ngblur
3 etc which I can not write here,


The beauty of a photograph can be seen from the uniqueness of the object that produced on the creativity of someone taking her picture, while one of the things that will enhance the effect of 1 focus back or front becomes ngblur, but do not disturb or destroy the photograph them. Blur effect in photography often at say bokeh, nah apasih it bokeh? bokeh has several meanings of any photographer in particular certainly have different opinions, but it refers to the one thing that is the area that can be said ngblur or ut of focus, as shown below.


then what if we will make the images into bokeh / blur without decreasing and disrupting the value of a photograph? blur effect can we make with the natural result of camera and lens we are also using image processing applications, one of which is Adobe Photoshop. His tutorial here.
Depth of Field and Bokeh
The camera lens is designed to focus on a certain distance range (not at a certain point, a misunderstanding is often the case). This distance range is called depth of field (or often also called depth-of-field / DOF). The objects are located in space will look sharp crisp and sharp objects in outer space would look blurry. The farther away the object from the DOF, will look more blurry. Therefore, one way to 'add' bokeh is to keep the background of the object. I think the camera lens has a system like our eyes, let praktikan a balpoint we hold and face-to our eyes and focusing on one point, namely the tip balpoint, then that will be visible behind ngblur, as well as lenses, the lens has a feature aperature, different lenses Also different aperaturenya facilities.

Objects with the same distance will look more membokeh if DOF diminishing. Therefore, if the pursuit of bokeh (alone), we can do it with a narrow DOF. What factors are affecting the thick / thin DOF?

1. Aperture


If we take pictures with the same lens (focal lengthnya), with the same scene, makaaperture larger (smaller aperture numbers) will produce DOF thinner, and therefore more bokeh results. As if the lens itself does not have a focal lengt, for example, 50 mm canon lens.

2. Focal length


With distance, aperture, and the same scene, then a lens with a focal length larger (zoom) will have the DOF thinner, making it more bokeh.
The point when we increase the zoom to the object image produced will ngblur and focusing on one point only, and vice versa.

3. The distance to the object


With a focal length, aperture, and the same scene, the greater the distance of the object, the thicker DOFnya. The more we approach the object, the thin DOFnya (and increasingly bokeh).
But in practice, if we use a lens with a focal length that is greater, we should retreat away from the object to get the same composition and that is wide enough so that the composition of the picture is more elegant, Focal length greater the more narrow the DOF, the distance to the objects farther away more strengthen DOF; These two effects cancel each other out.

CONCLUSION
So, as a summary, in order to strengthen the bokeh effect, we can:
- Using a larger aperture (smaller number). In the canon of 50 mm, F 1,8 = maximum blur F 23 Sharper all objects not ngblur!
- Keep the background with the object
- Move closer to the foreground camera
- Using a lens with a focal length more telephoto (only visible lebihbokeh)
- Approaching the object without changing the focal length (possibly changing composition)
Keep in mind, the things above only affect the degree to blur late or kebokehan only. Quality or
So, when to start practicing creating bokeh in the photo? :)

Hopefully useful, and soon learn how to practice it, if you do not understand please comment below ya

LEARN TO ANALYZE THE LENS CAMERA LENS WHEN YOU BUY

LEARN TO ANALYZE THE LENS CAMERA LENS WHEN YOU BUY


Hallo guys !! 
Maybe for those who are new to the world of photography is very confusing when choosing a good lens for use, one type of lens below.


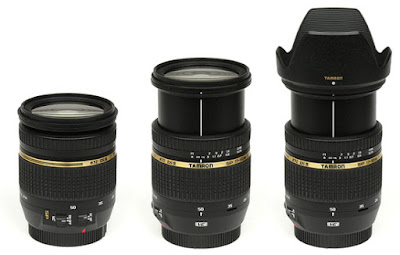
Tamron AF 17-50mm f / 2.8 SP XR Di II LD Aspherical [IF] VC


No one knows what the meaning of each name at the top? Very long! And filled with stands! More dizziness again, each lens manufacturers use different terms to say the same thing .. So even if we already know the meaning of terms Tamron lens, for example, we will still see the term confusion Sigma lenses! Or any other brand lenses.
Let's get on with it!

Through this article I tried to explain what are the specifications that could exist in the lens, and its use. Unfortunately I have not memorized the term used each lens manufacturers to label their lenses, so maybe you need to browse alone to see the list of terms used to refer to the specification described here. Because too many different names used by each lens producers, such as sigma and tamfron.

1. Focal length (real and equivalent)


Focal length is the distance of the focus point of the lens. This affects the width of the field of view lens (FL equivalents), thick sharp space (FL real), and the ratio of the size of objects that are different distances from the lens (FL equivalent). The bigger the FL lens, the field of view will be more narrow (as if we approach the object), depth of field will be more narrow (in distance and aperture are the same), and objects distant (background) will look more similar in size to the object -benda near (foreground or main object). The equation is the size commonly referred to as (effect) compression: because objects behind the visible size is not too different from the object in front, they look as if it is closer to one another. That's according to the professionals different again with the commonly used definition of a layman, the lens 'zoom' means that the lens has a varied FL. For example, as the above example, FL has a 17-50mm. A lens that can make us as if approaching object is called a telephoto lens (FFL), and telephoto lenses usually have FL 135mm upwards. On the other hand, could have a telephoto lens is also a zoom lens, for example 150-500mm lens with FL (large FLnya = tele, FLnya vary = zoom). The opposite of tele is wide (wide field of view, small FL).
What does that mean in real FL and equivalents? FL Real means that number refers to the focal distance of the lens itself. FL equivalent of a lens refers to a lens whose focal distance when mounted on fullframe cameras will have a field of view (field of view) are the same as the lens (if installed in the camera).
For example: a 50mm lens when mounted on a camera Olympus PEN will have the same field of view with a 100mm lens on fullframe cameras. Then, a 50mm lens FL is said to have the equivalent of 100mm on the Olympus PEN cameras. Multiplier (2x) is called "crop factor", which is influenced by the size of the camera sensor.
But in my experience that the lens does not have the result sharper FL  that in my opinion does ya hehe

2. Aperture / maximum aperture


Most lenses can write a maximum aperture of the lens used. For example, the kit lens / standard DSLR usually have a spec 18-55mm, f / 3.5 - 5.6. This specification means that the lens has a range of between 18mm to 55mm FL. In the FL 18mm, the lens has a maximum aperture of f / 3.5; in the FL 55mm lens has a maximum aperture of f / 5.6.
If a zoom lens has only one aperture numbers are written down, meaning the zoom lens has a maximum aperture the same, F / 3.5 indicates that a minimum aperture of the lens, the lens has a very small aperature the bokeh effect to any better.


3. Crop factor


As described above, the camera has a crop factor. For most brands of DSLR, there are only two types of cameras: fullframe (no crop factor, or crop factor 1x) and APS-C which has a 1.5x crop factor (Nikon, Sony, Pentax), or 1.6x (Canon). Fullframe cameras have a sensor size that is larger than the APS-C. Therefore, the lenses used would be different.
Fullframe lens produces images that are wider in the fields of sensors, while the APS-C lens produces images more narrow, and only enough to cover the field of APS-C sensor only. Therefore, fullframe lenses can be used on an APS-C camera, but the lens APS-C can not be used on fullframe cameras. If the APS-C lenses used in cameras fullframe, then the result will be vignetting (no black around the photo), because the lens only produce images in the central part of the fullframe sensor field. Not all lenses are suitable for your camera, consider the special lenses for camera 5D Mark III, does not fit mounted to the camera 1100 D if even then canon there is also nikon types are specified, the point if you buy a lens adjusted first to the needs in the camera your own whether compataible or not.
Lens crop factor of APS-C vs. This fullframe written as: EF-S vs EF (Canon), DX vs. FX (Nikon), Di II vs Di (Tamron), etc.

4. Silencer vibration


Some lenses have a vibration dampening mechanism. If we hold the camera by hand, the camera will inevitably sway, albeit slightly. In a slow shutter speed, wobble will be visible in the photo. This mechanism allows the lens elements to move against the direction of oscillation / vibration our hands, thus eliminating judder effect seen in the photo.
Most vibration dampening mechanism reduces vibration up to 2 stops, which means the rocking effect will be reduced so that it looks as if we are shooting with a 4x faster shutter speed (the same as the second stop). Lenses can we take the example of a football photographer if not wearing a monopod, photgrafer racing cars and others.
This mechanism is called the IS (Canon), VR (Nikon), VC (Tamron), OS (Sigma), OSS (Sony E), etc.


5. Motor / focusing mechanism


Many manufacturers of lenses use focusing mechanism different motors in their lenses. If a lens using a good mechanism, usually this will be included in the name of the lens. Good mechanism usually means the lens will be faster when autofocusing, and his voice was more subtle.
This mechanism is called the USM (Canon), SWM (Nikon), USD / PZD (Tamron), HSM (Sigma), SSM (Sony), and so on.
but also to adjust your camera, if you're a Canon 550 D camera and compared with canon 5D mark III is definitely more subtle canon 5D mark III hehehe. The point is to understand the theory and clay fact we have a camera like.

6. Internal focusing


The lens will typically rotates and extends / short while focusing. Internal focusing means the lens does not extend / short or rotating during focusing. This is useful when you use a filter that needs to be used with angle
Similarly, for example, GND or CPL that the photos you become more dramatic.

7. Rear focusing


The term means the rear focusing lens in the lens perform focusing by moving the rear element. This resulted in focusing becomes faster and smoother.
Until this point, virtually all important spec lenses that you already know. Subsequent terms only refer to the technology used in optical elements. The technology is very influential on the result of your photograph.

8. Aspherical element


Aspherical lens element indicates that the use of optical elements whose shape is not round. This reduces the effect of convex on the image, and also enables a more compact lens design and quality. Usually the lens above 1000 USD were like this.

9. Low Dispersion


Have you ever seen a purplish color (usually) on the edge of the bright areas / white in your photos? It is called color fringing or color aberration (CA). Low dispersion indicates that the lens has a CA that is less than a lens that does not have a low dispersion. The point is customized to the needs of each, sometimes human tastes different.
photography may be useful forward world!